Ice Screw Apple Corer + Apple Ribbon Galette- 02.27.15
 On random inspiration from our Ice Climbing Adventure in Johnston Canyon last week - i feel ridiculous saying this - but when i was playing with the ice screws that we were hanging from, all i could think was… APPLE CORER! The one i’d been using previously was hard to aim accurately (honestly, most apples don’t have perfectly vertical cores!), sprayed a mess of juice all over, and were hard to get the cores out of. The ice climbing screws are precision engineered to make a perfect hole and displace the ice out of the center. The Black Diamond Express Ice Screw even has a little crank knob that flips out to make it even easier once you get it going. Inspiration comes from everywhere, right?
I’ve also been experimenting with different things i can do with my Benriner Spiralizer - mostly because it’s so fun, and its fascinating to see how a recipe changes when you alter the form of the ingredients! So coring the apples, then using the spiralizer to slice the apples into ribbons (basically take out the blade with teeth), creates a delicious pie filling! Much more tender than the usual chunky apple slices, yet they still hold their form nicely. I love the way it tastes and feels! (You’ll understand once you try it!)
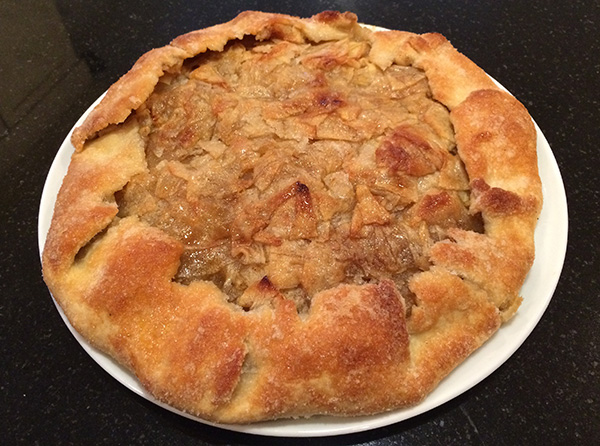
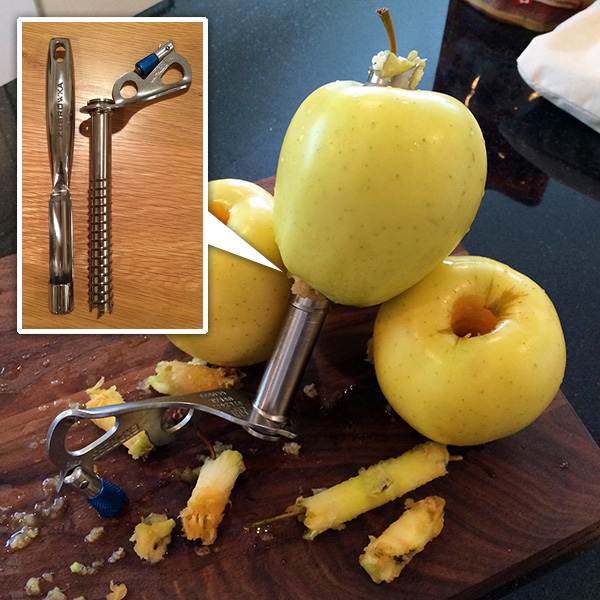
So freshly home, and catching up - I had to make an Apple Ribbon Galette inspired by our Alberta Winter Adventures! So the apples are cored with the ice screw from ice climbing in Johnston Canyon, Banff, they were sliced up on the cutting board i made with Oliver Apt, Edmonton, and spiced with apple pie spice from Silk Road Spices, Calgary! Check out my Apple Ribbon Galette recipe and more on the next page!
Here’s the Black Diamond Express Ice Screw that we used on our Ice Climbing Adventure in Johnston Canyon - these held us up as we climbed the ice! You basically hold it perpendicular to the ice, and get it started with the large handle. Once it gets going, you can flip out the little knob to spin it faster. The screw displaces the ice through the center.
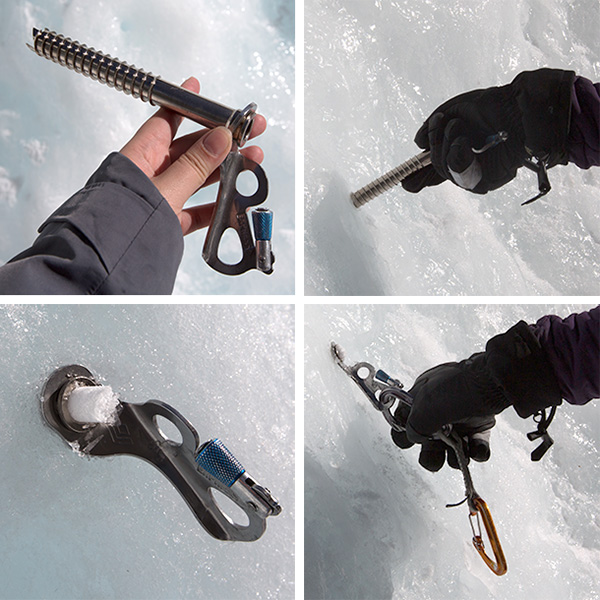
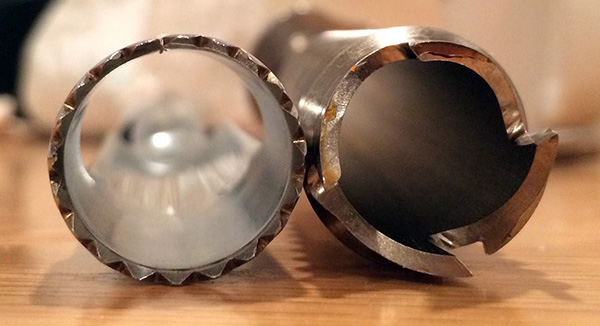
You can see how it compares to a basic apple corer. Functionally, it is far more efficient and precise… less apple spray all over, and it’s a breeze to clean the apple out of the screw with a chopstick.
The size of the hole they create is surprisingly similar!
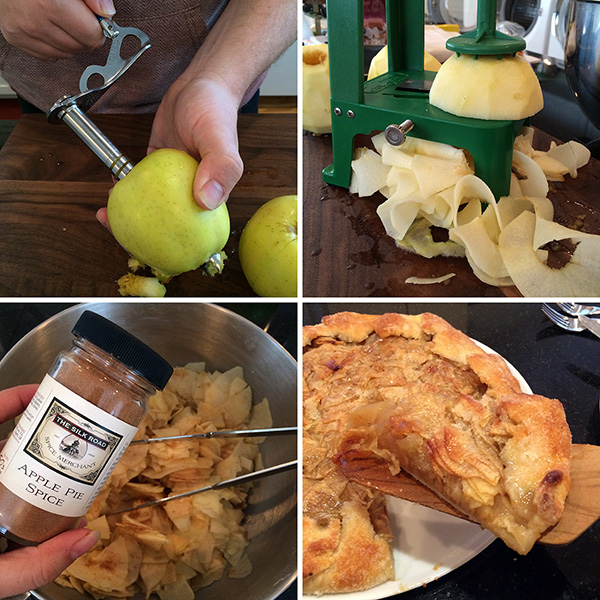
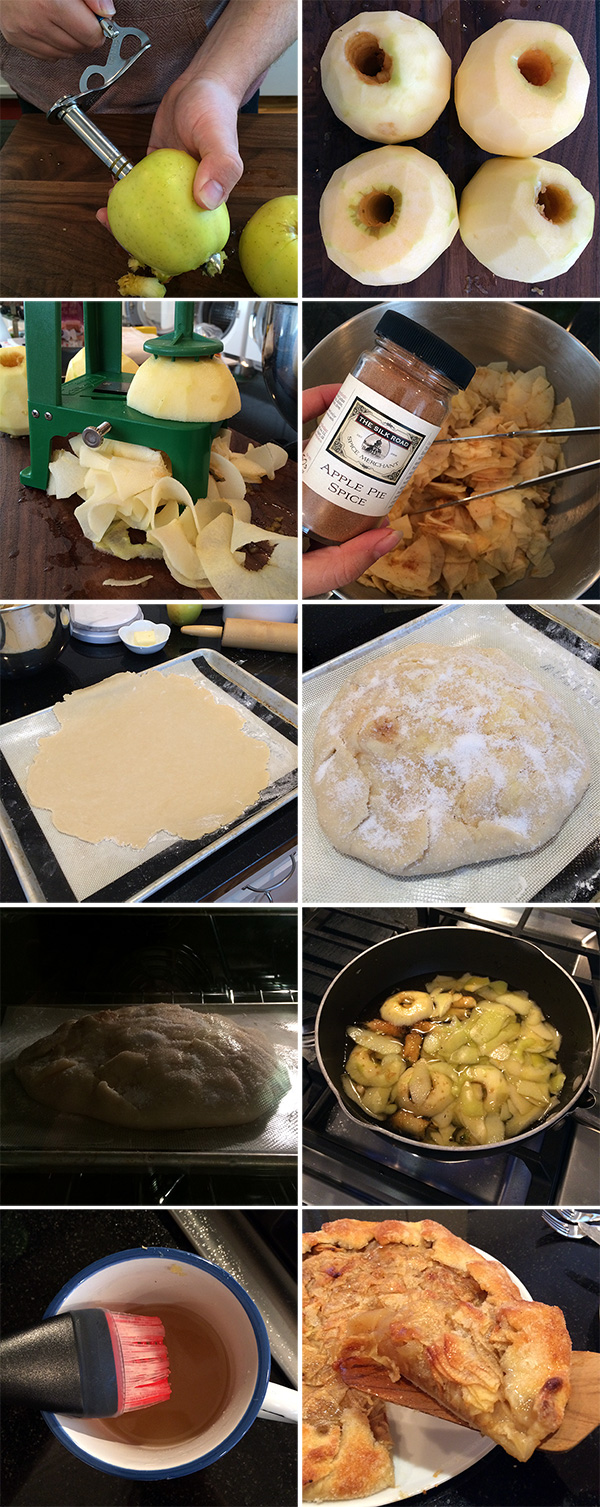
Here’s a quick look at how it’s made! Recipe below. It’s a twist on Alice Water’s Apple Tart on Smitten Kitchen.
APPLE RIBBON GALETTE!
INGREDIENTS:
Dough: 1 cup (125 grams) unbleached all-purpose flour 1/2 t (2 grams) sugar 1/8 t salt 6 T (3/4 stick or 85 grams) unsalted butter - softened - 1/2-inch pieces 3 1/2 T (50 ml) chilled water
Filling: 2 lbs (910 grams) apples (Golden Delicious or another tart, firm variety) 2 T (30 grams) unsalted butter - melted 5 T (65 grams) sugar 1/4 t apple pie seasoning (cinnamon, nutmeg, all spice, cardamon, cloves, etc.)
Glaze: 1/2 cup (100 grams) sugar
DOUGH - Mix the flour, sugar, salt and 2T of the butter in a mixer until dough is coarse cornmeal like. Add remaining butter and mix until largest pieces are pea sized. Slowly add water in until the dough holds together. Toss with hands until ropy - add more water if needed. Refrigerate at least 30 min.
FILLING - Core the apples (i like using an Ice Climbing Screw!) Then peel the apples. Put the cores and peels in a saucepan for the glaze! Then turn the apples into ribbons with a spiralizer (without the toothed blade in, they turn into pencil shaving like ribbons!) Toss them with the apple pie seasoning.
GALETTE - Heat oven to 400°F. Dust surface with flour, and roll out the chilled dough to around 14” diameter and 1/8” thick. Place it on parchment or a silicon sheet on a baking sheet. Mound the apple ribbons in the center, leaving a 2” edge. Compress the apple ribbons on the edges, since they will bake down leaving the crust floating otherwise. Fold and pleat the edges.
Brush the melted butter over the apples and dough. Sprinkle the 5T of sugar over the galette (approx 2T on crust, 3T on apples).
Bake it in the center until the edges brown and the crust caramelizes - around 45 minutes. With a convection oven, there’s no need to rotate it. For a normal oven, rotate every 15 minutes.
GLAZE - In the saucepan of peels/cores, add sugar and barely cover with water. Simmer for 30 minutes. Strain it. (I like using a small sieve and muddler.)
FINALLY - Remove the galette from the oven. Let it cool for 15 minutes. Brush on the glaze! Then enjoy the deliciousness!
Side note - there’s so much glaze usually left… which is basically a nice apple simple syrup… so make some cocktails!