
NOTFZJ80: PART IV- 08.15.14
 The NOTFZJ80 Project is being sponsored by our friends at AutoNation: America’s largest auto retailer with 270 stores selling 33 brands nationwide backed by industry-leading policies like SmartChoice pricing and no-hassle money back guarantee. They are helping us turn our 1996 Toyota Land Cruiser into an overland adventure rig to go discover inspiration off-grid! Follow the progress here as we build up to our first trip.
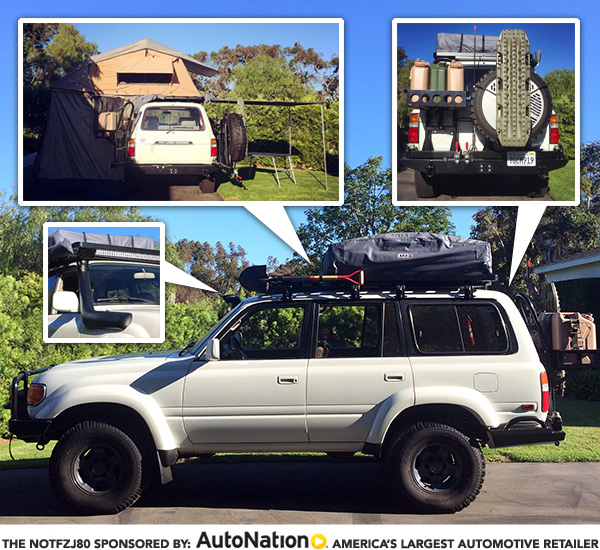
Wow. We’ve so much has changed since the last update on our NOTFZJ80 Project. When you last saw it, we installed the front bumper + winch and were in a holding pattern as it got some work done at TLC. Well - it’s back! It’s had front axel, transfer case, bushings, and differential rebuilt and new Old Man Emu suspension, DBA brakes, radiator and rear bumper installed. Since it’s been back we’ve also installed a 40” LED light bar and snorkel on the front - awning off the passenger side and annex under the rooftop tent - and filled the rear bumper with jerry cans, spare tire, MaxTrax, and grill! Needless to say - we’ve been busy, and we’re just about ready to go test out camp with the NOTFZJ80. Check out our progress on the next page.
Jonathan Ward was kind enough to send over some pics of the NOTFZJ80 while it was getting work done at TLC.
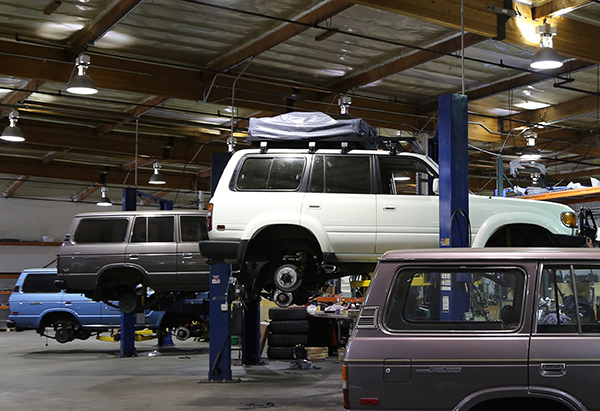
It was quite a month - with front axel, transfer case, bushings, and differential rebuilt and new 2.5” Old Man Emu suspension, DBA brakes, radiator and rear bumper installed.
By the time it came down - it was definitely riding a bit higher and sporting a new rear.
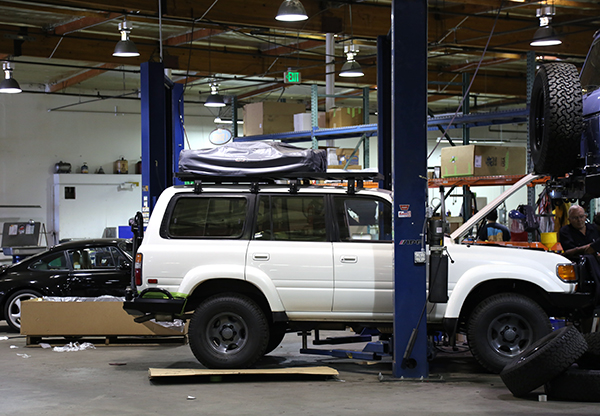
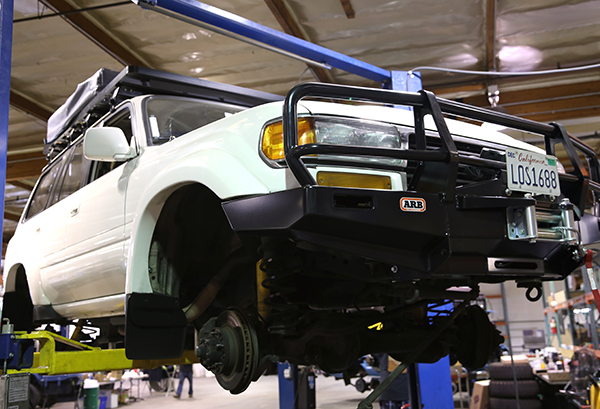
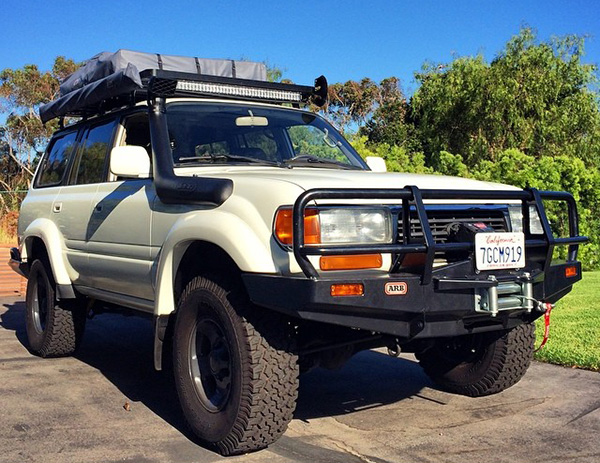
Here’s how it looked when we went to pick it up!
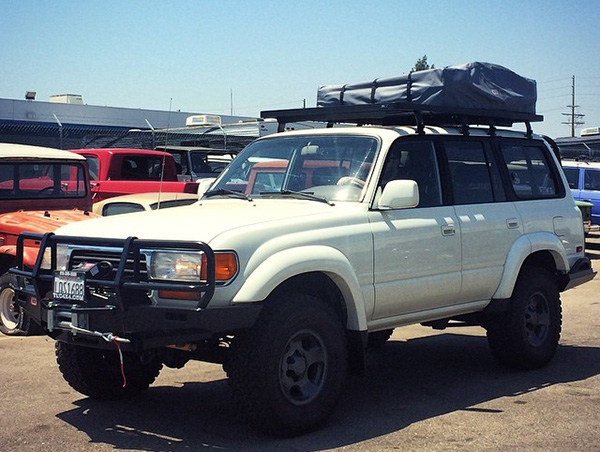
Peeking under you can see the signature yellow from the Old Man Emu. Following it home, the Slee Offroad Rear Bumper looked so naked! When we got it home and were working on the car, hooked Bucky to the D-ring and he decided to take a nap underneath. On upgrades, we swapped in a DieHard 31M marine battery for more cold crank amps and more reserve.

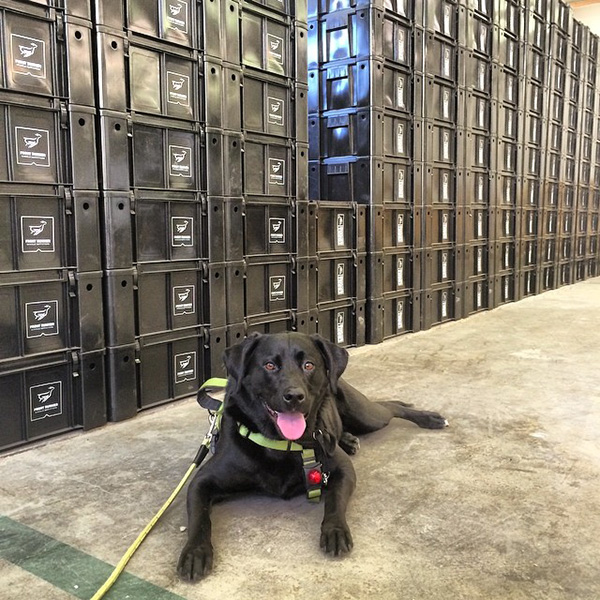
Next stop was visiting Front Runner Outfitters at their brand new Agoura Hills warehouse and showroom. Here’s Bucky relaxing next to a wall of Wolf Packs…
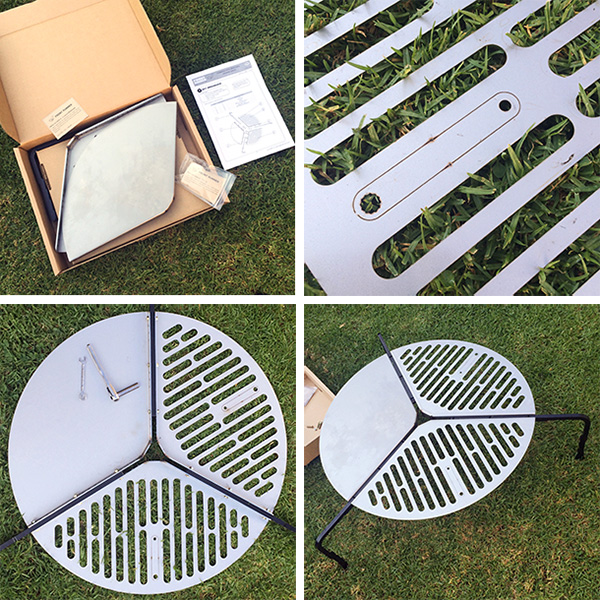
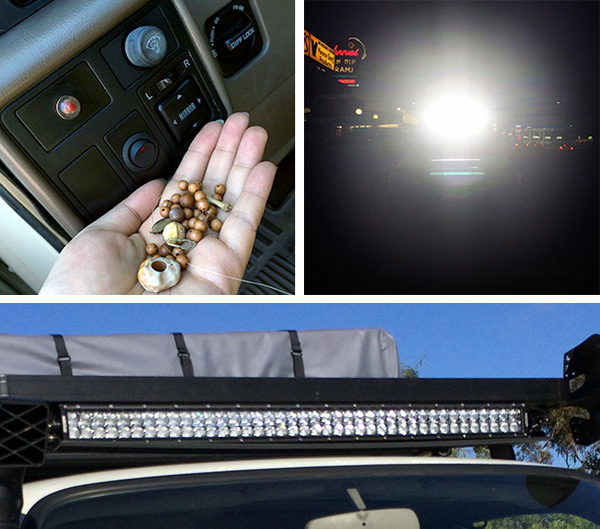
While there picking up a 40” LED Light Bar with Performance Shield and Awning Mounts - we couldn’t resist a their Spare Tire Grill! Laser cut/welded steel grill with a brilliant detail of a built in wrench for assembly! I haven’t popped them out yet, since the ratchet and wrench were so close. The grill is even adjustable depending on your tire size, and fits surprisingly snugly.
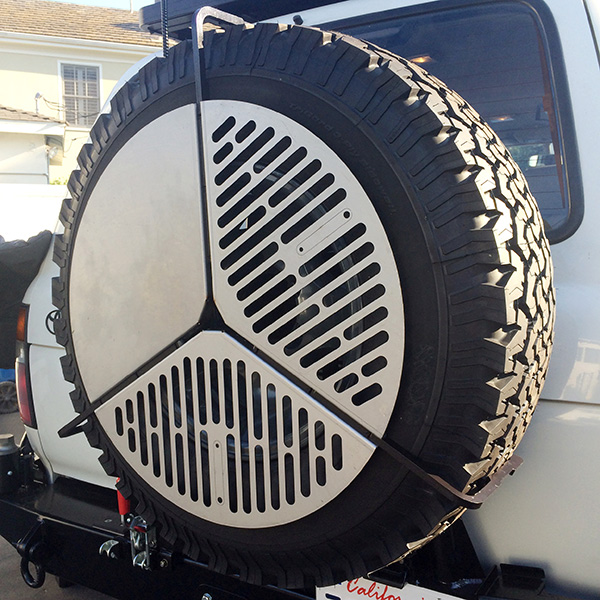
Here’s the grill on our spare!
When installing the 40” LED Light Bar with Performance Shield button - the strangest surprise was finding a necklace tangled far in the electronics of the car! And while we were warned that the light bar was UFO abduction level bright - 19,800 lumens is BRIGHT!
Next up was the Safari Snorkel. The install was no easy task - first lining up where we needed to drill, then drilling into the body of the car! Then came reaching our arms so far up the snorkel that our finger tips were barely able to bolt it on…
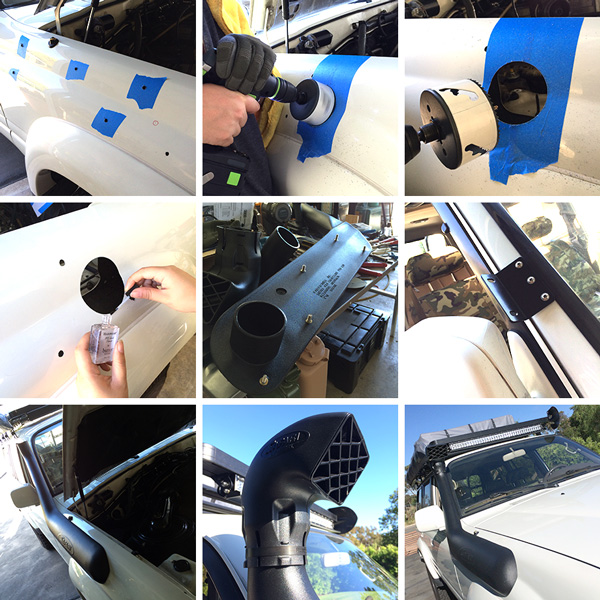
Snorkel installed! Bring on the water, the dust, etc…
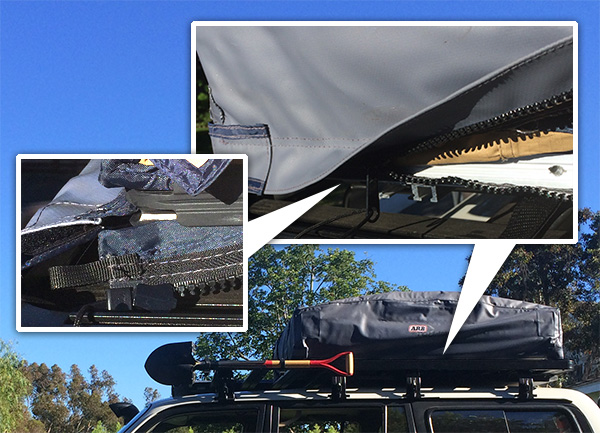
On sillier things - with no instruction on how to install the roof top tent cover, it didn’t seem right that it simply slipped on and got velcro’d down. Wind would inflate it as you drove. So upon further examination, we figured out that you slide the piping of the zipper around the base of the tent. When you unzip and open the cover, you can leave it hanging on the side of the car, but i’m working on rigging something up so it can compactly roll up and not block the back door.
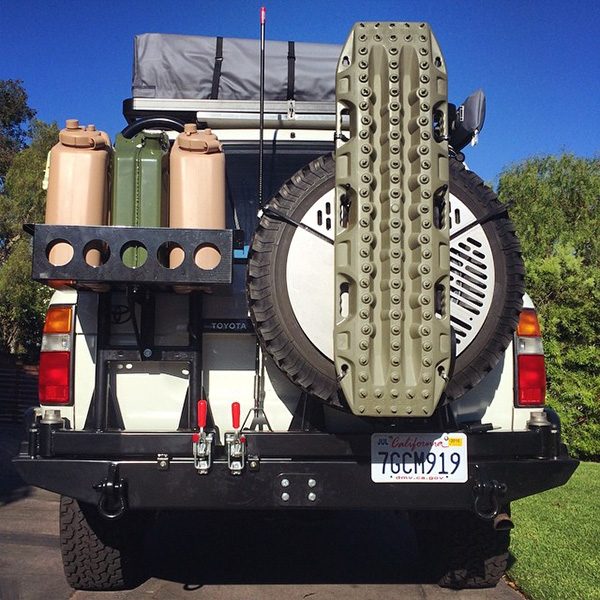
A look at the Slee Offroad Rear Bumper on the NOTFZJ80 loaded up with jerry cans, CB radio antenna, full size spare tire, Spare Tire Grill, and MAXTRAX.
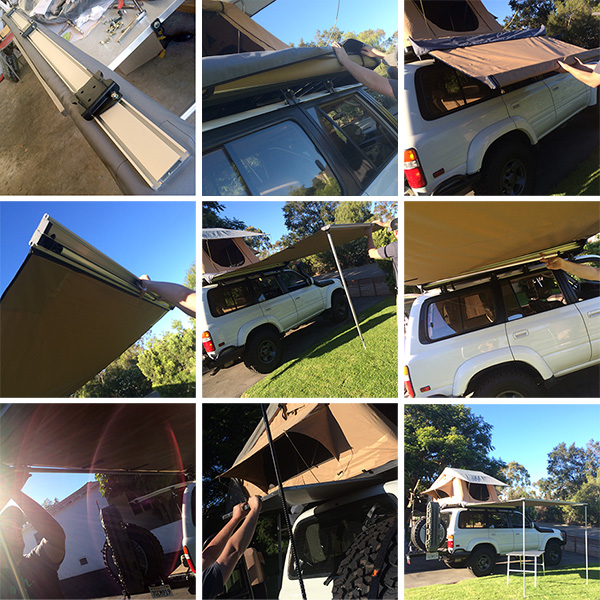
Now getting camp ready - time to install the ARB Awning 2000! The Front Runner Awning Mounts fit perfectly with the ARB rails to mount to Slimline II Roof Rack. After installing - you simply unzip, unroll, pop the vertical legs out, then pop the horizontal supports out and secure it all with velcro and stakes! Combined with the Prep Table mounted under the roof rack - add chairs and camp is practically ready!
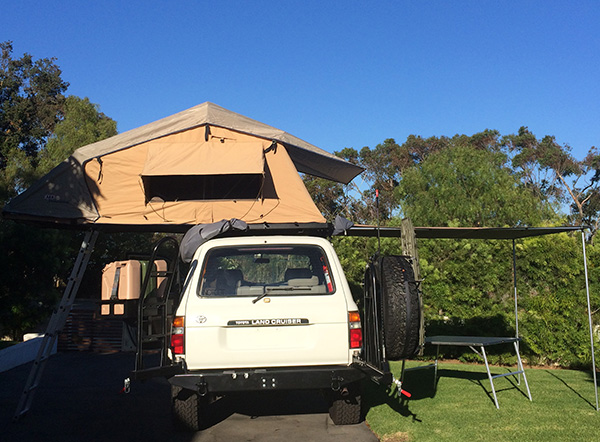
The span of the ARB Awning 2000 creates quite a bit of space to relax under.
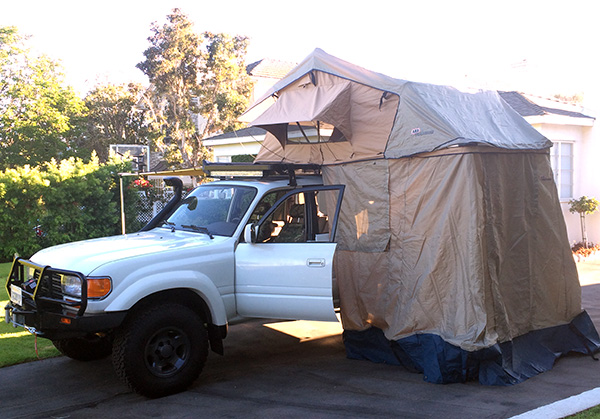
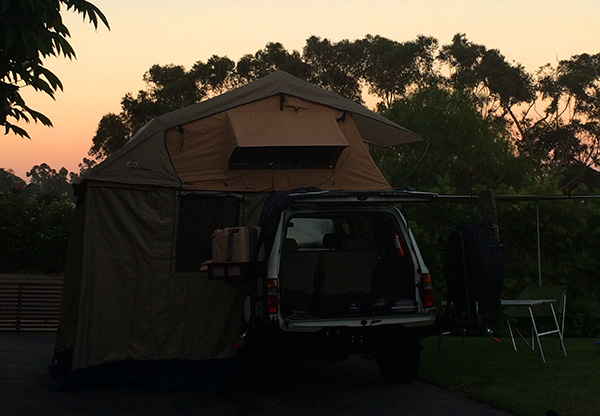
Next part to set up is the ARB Rooftop Tent Annex that fits perfectly with our Simpson III Rooftop Tent… basically it creates an additional room beneath the cantilevered part of the tent. Just like the tent cover above, you slip in piping to the frame, and zip to the tent. The rear of the annex is removable to allow you access to the car if desired. Additionally you can add the fourth wall and stake out the whole annex for quite a contained and spacious room - or ground floor - to your roof top tent!

As with the tent, the ARB Rooftop Tent Annex, has doors and windows that can be fully opened, or left with screens. The base of the annex is made of a more rugged tarp like material to hold up better to the elements and allow for staking it into the ground.
As the sun sets on us - now it’s time to hop in an test it out!
 Next step… test trip perhaps?


This thing is a beast! So Awesome!
----- Brian Takumi 25.08.14 10:17